By Geoff Stolberg (jag-one) [Be sure to read the comments below the post, plus extra material added to the post at the end]
Hi Yakkers,
Well, with the rubbish weather we are having, I thought I’d catch up on the subject of Polycarbonate. You may remember a recent
Trip Report from Sunshiner, extolling the virtues of his new GPS holder made, by me, of polycarbonate.
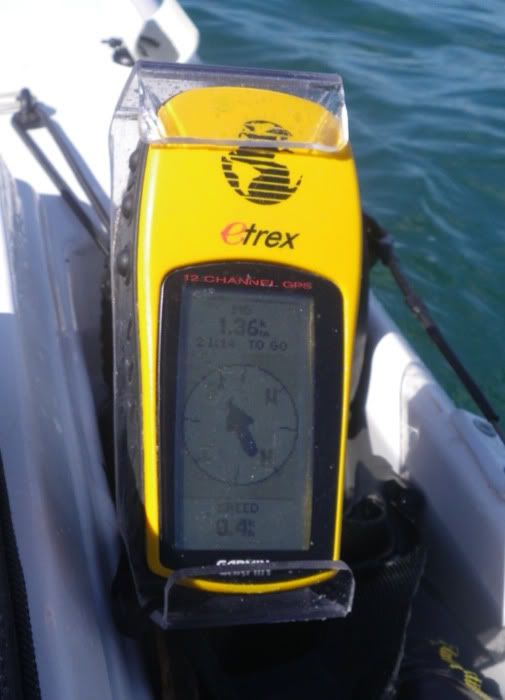
Here it is again, very neat, eh!
If you aren’t familiar with polycarb, I’ll gladly share my knowledge with you.
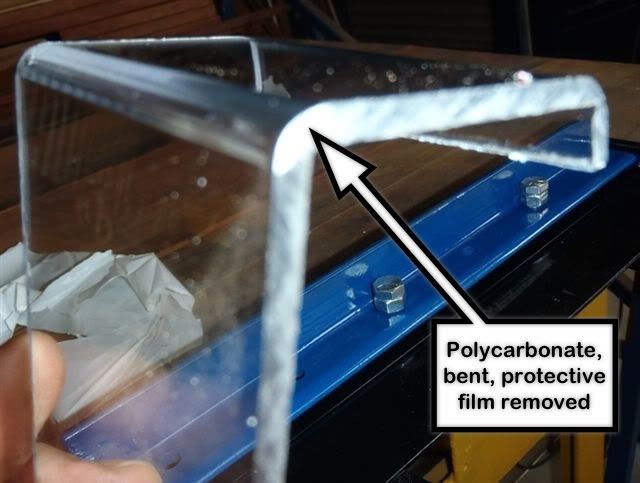
Most of you are probably aware of Acrylic or Perspex, and that it can be heated and shaped etc. Polycarb was originally marketed as Lexcen, and was touted as being unbreakable. That’s certainly its prime characteristic but, its biggest asset, I think, is that it can be Cold Bent. This means that if you have access to a metal folding machine or something similar, you are on the track to shaping polycarbonate to suit a variety of needs.
Polycarb cuts and drills the same as Perspex. I try to do my cutting on a tungsten tipped saw bench, but a jig-saw or even a hacksaw will work, obviously depending on the size of the job. My original GPS holder was bent up from acrylic, which took a bit of trial and error. Kev’s holder took me about two minutes to do the bends.
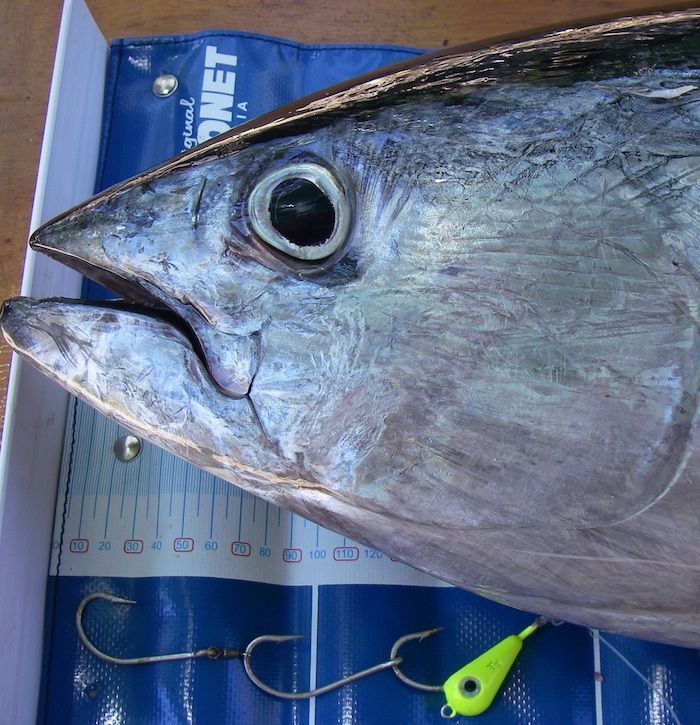
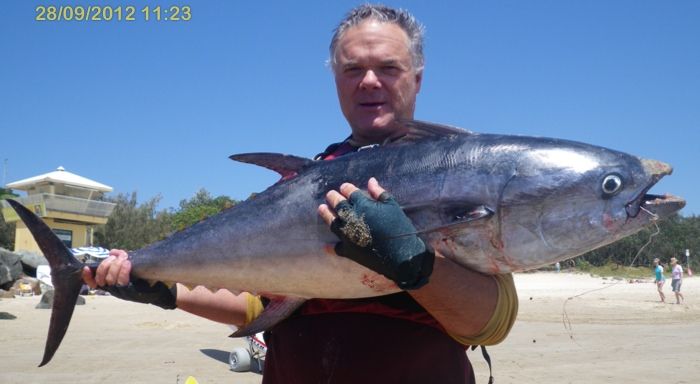
The only drawback with my personal metal folder is that it’s set up for sheet metal, which is anything from .6mm to 1.2mm thick approx. This tends to crease the polycarb when you’re going for a 90deg bend and this is why I have put 2x45deg bends on the rod holder mounts (see pic below). The rod holder in question was used when catching one of the pair of 50cms snapper on my last trip to SR, and worked perfectly. I’m now working on being able to adjust the bender to suit polycarbonate better.
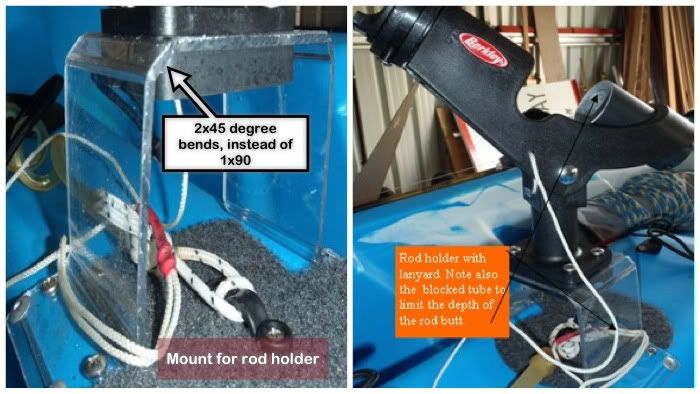
The polycarb mount (left) and the rod holder in place (right)
Polycarb is used by domestic and auto glazing firms and, if they are like me, they will have an offcuts box at a reduced rate. Amateur lure makers often raid these offcut bins for material for their lure bibs.
Most places which carry polycarb would cut to size for you. It is generally available in 3, 4.5 and 6mm thicknesses, although the heavier gauges are obviously harder to bend. Your local sheet metal shop will have an assortment of benders so it might pay to get to know the owner.
Geoff
More from Geoff, 28Jan12
::::::::::
Hi Yakkers,
After reading Jimbo’s comment on the blog, I realized that I needed to go back to the man cave and do some thinking. I need to do some more bending to make my camera holder, a la Sunshiner, and I didn’t want the creasing from my current machine. Also, I need to come up with something portable, so that you guys can benefit, too.
Anyway, the design is done, giving a unit about 300mm long, and able to be clamped into a vice or screwed to the edge of a bench. Since most uses would call for bending pieces up to 150-200mm wide, ie mounting brackets, then that size should work. Three pieces of angle iron is the basis, so watch this space. Any ideas or suggestions would be welcomed before it goes into production.
I’m looking forward to a PC workshop at Jimbo’s.
See you on the water
Geoff Stolberg
Call Sign ..JaG one
Pics etc added 01Feb12...
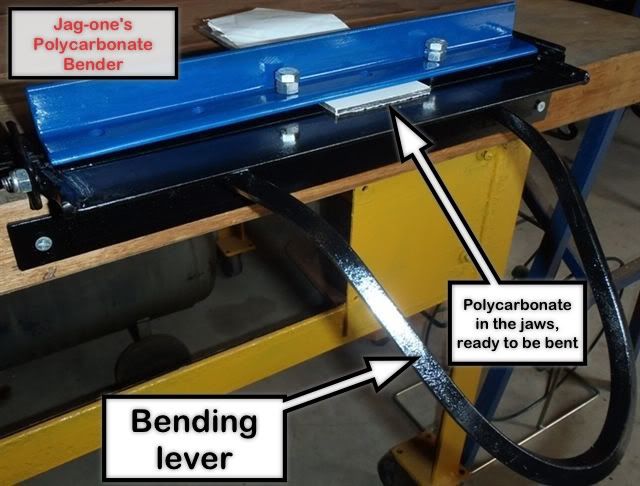
The unit will take up to 270mm wide, which should suit our requirements. It can be screwed to a bench or fitted into a vice. As you can see, I have fitted it to my heavy bench. The weight is only a couple of kilos, so very portable. The bending procedure of any job depends on the shape, so the pics are for example only.
:::::::::
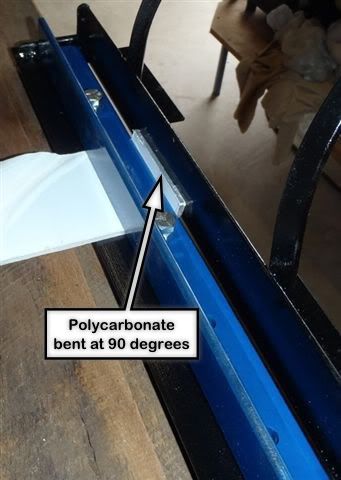
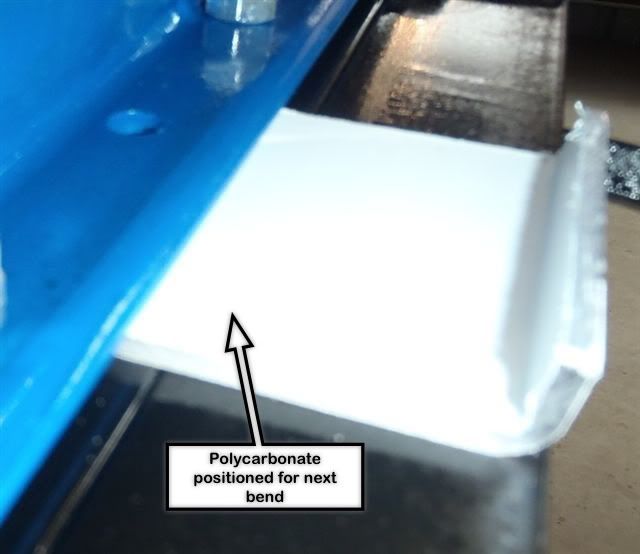
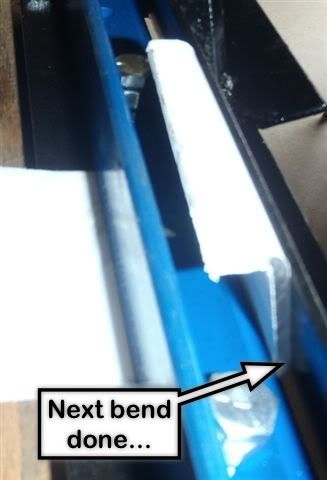
Pics provided by jag-one on 01Feb12 and posted same day. There are six pics below, which, if viewed in sequence as you scroll down, show the device and how it is used. Thanks, Geoff.
::::::::::::