Noosa Yakkers' own Brag Mat and Limits Table

This mat, sold only to Noosa Yakkers, and first announced in late 2014, is something to brag about itself. For a start, it's 160cm, that's 1.6 metres, long. We can measure stormin on this mat! Redwood? No!

The first batch of the mats have been in full use since March 2015 and they've had lots of use, especially by those of us who have been bagging the biggies in the last few months, as you'll have noticed from the pics on our Facebook Group and in TR. And in case you ask, there have been no complaints and no improvement suggestions so it seems we have the perfect yakking product.

An overview. Note the "Yeehah!" zone from 130cm to 160cm.
Unlike other brag mats we've seen, all gradations (down to 1cm) run almost the full 40cm width of the mat, thus making it easy to read the length to the tip of the tail of a big fish, like the big Spaniard on the mat further down on this page.

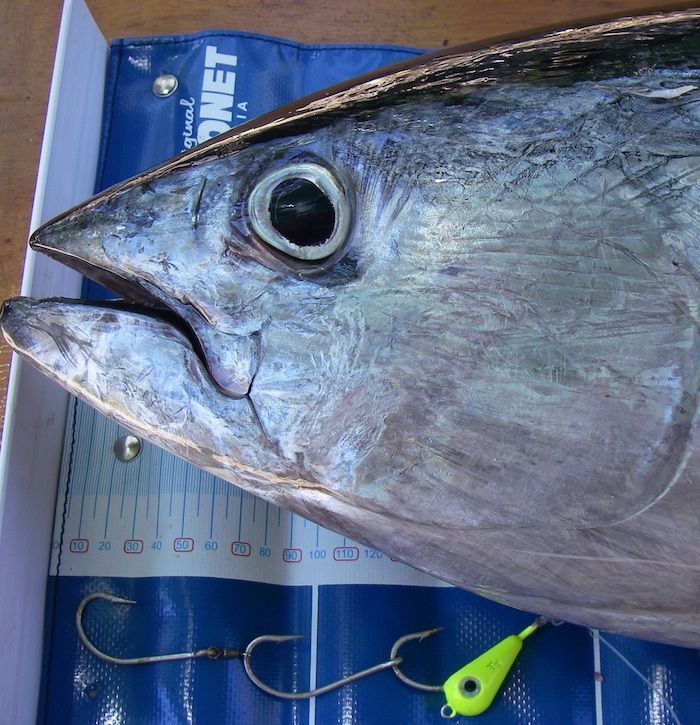
Zoomed in to the first 70cm of the design. See how the 1cm gradations go close to the edge?
The mat has a 50mm plastic right angle extrusion, 40cm long, at the left end, thus making it easy to line up the nose of bigger fish with the zero mark. It also has a quick check 40cm measure on the back, visible when it's rolled up as well as sewn-on elastic straps to keep it tidy when not in use.

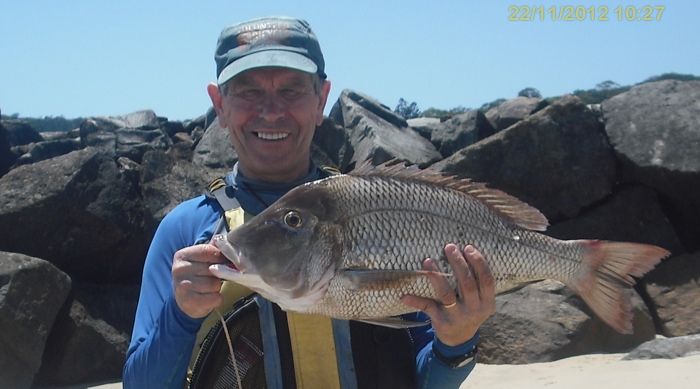
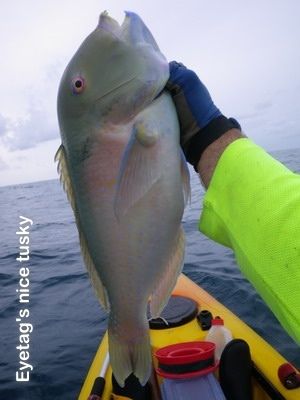
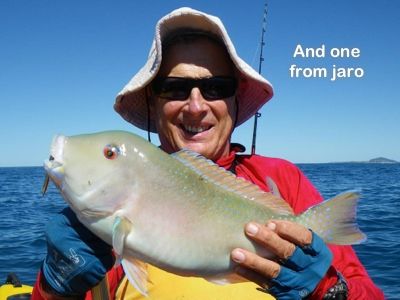
A nice snapper nosed onto the nose plate.

This mat will lie patiently and flat on the beach awaiting your fish. No more holding the corners down or piling sand on the corners to stop the mat doing the old auto-rollup trick. The material is tough but limp.

This mat has been designed by the Noosa Yakkers team for yak fishers. It's easy to clean, stow, wash, and is virtually guaranteed to attract fish holders as soon as you roll it out on the beach. Just take care you don't get trampled as they rush with cameras in hand to get a look at it.

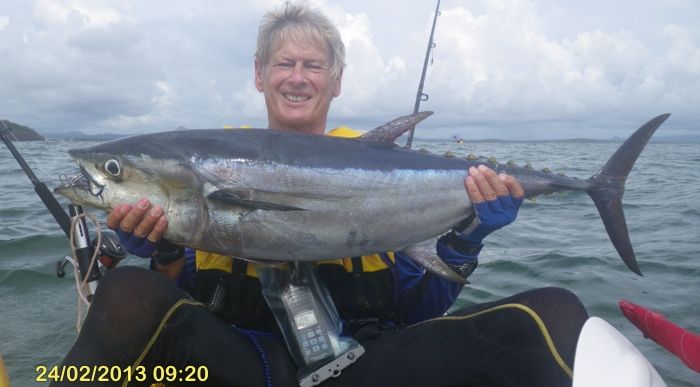
What does it look like with fish on? Bloody fantastic.

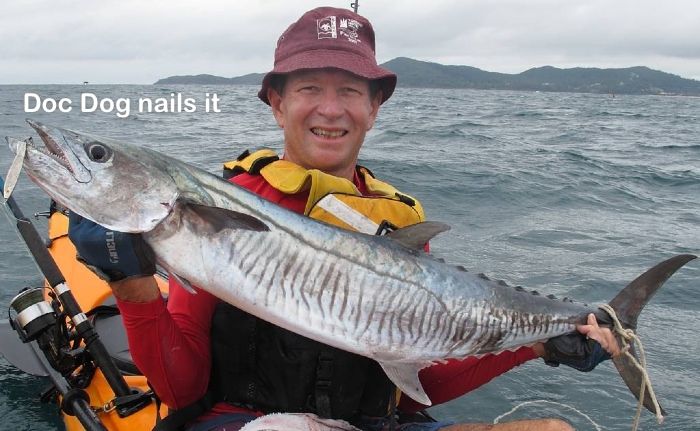
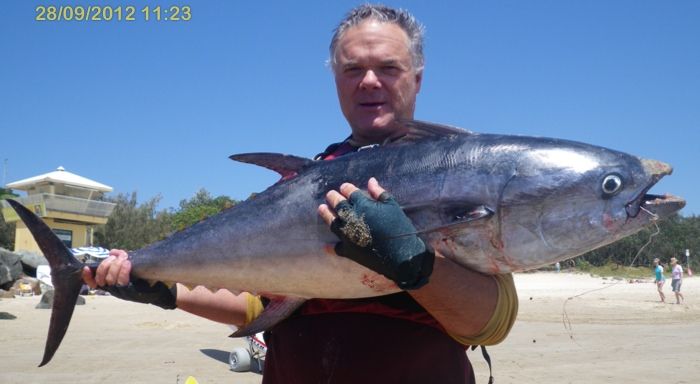
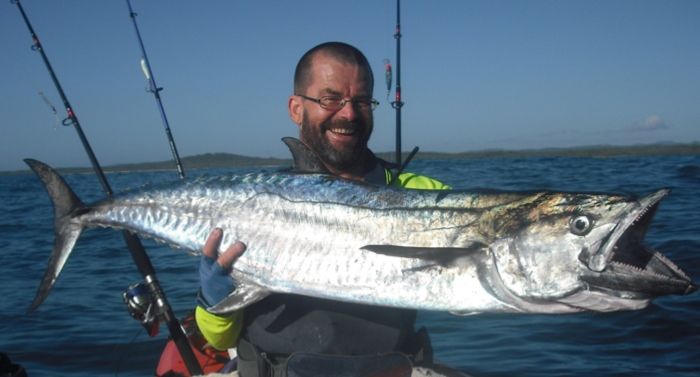
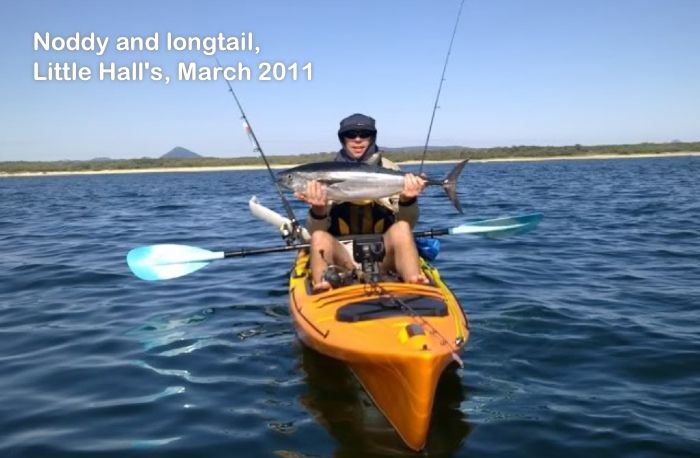
Tunny's really nice PB Spaniard measured on the mat. Will you have a big enough mat when you finally get that biggie?

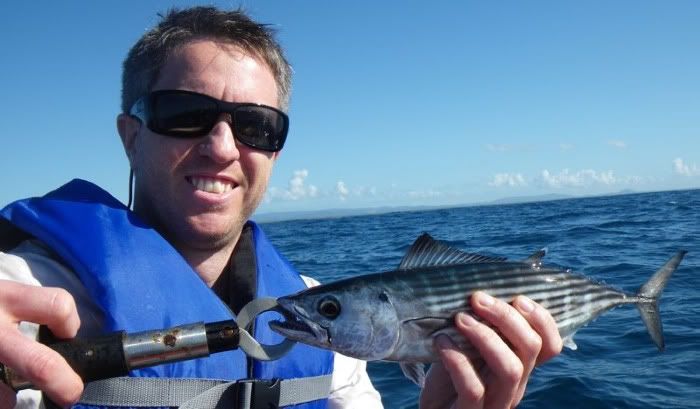
A couple of other examples:

Two snapper in tandem.

Even works upside down!

The cost? Only about $30 (dependent on the AUD/Yuan conversion rate at the time of ordering).

And for only another ~$5 you can grab a 20x25cm Noosa Yakkers-designed waterproof Limits Table detailing the limit rules for all relevant Noosa area fish. The Limits Table is made from the same durable vinyl material as the Brag Mat and has a brass eyelet in one corner for securing almost anywhere in your kayak. These have also sold well and have all but stopped the radio enquiries we used to get while on the water like "What's the bag limit on grinners?".

The initial order of brag mats in December 2014 was well received. If demand continues, we’ll order more each year but we need a minimum number of ten per order. Like one? Just email the Group or post on our Facebook Group and a committee member will contact you.

Thanks, Harvey

As far as I can tell, Harvey’s last trip (report here) with us, on 04Aug2008, was also his most successful, as it was on this trip that he bagged his first decent snapper. Shortly after this he became seriously ill, which put a stop to his kayak fishing career, but, fortunately for us, not to his interest in Noosa Yakkers.

It must have been in May 2009 when Harvey, while battling to overcome the life-threatening disease which had buggered up his life, emailed the rest of us Noosa Yakkers and announced that he’d set up a blog for us. In time Harvey's blog (same address as our main blog now) became Noosa Yakkers’ link to the outside world, and became sprinkled with comments, images and video links. It also contained an email link which allowed interested parties to enquire whether they could join us. Harvey continued to look after this blog until now, and was closely involved in planning the recent changes which were made to incorporate that blog into the others which became necessary as Noosa Yakkers grew.

Harvey has decided (March 2012) to cease activity with Noosa Yakkers. But he still lives nearby and mixes socially with some of us. This permanent post is Noosa Yakkers’ lasting symbol of gratitude to Harvey for his positive input into our little group. Thanks Harv!

Keen Angler Program

We support the Queensland government's Keen Angler Program (website) because we hope that the material and information we provide will be used to try to ensure that our children and grandchildren will enjoy fishing at least as good as we experience now.

One of the Keen Angler Program employees has an email address included in our group email for the purpose of facilitating easy communication between Noosa Yakkers members and Keen Angler Program. If you'd like to help don't hesitate to contact Keen Angler Program via any of the email addresses provided on the above website.


Wheeleez Kayak Trolley

by Jaro

We were much younger (actually not that much younger) when we started kayak fishing and even then what we dreaded most and felt tired us out the most (probably because we were already tired from all the paddling) was the carting of our kayaks back up the sandy beach to our cars. The wheels of the trolleys we used then were narrow and hard which resulted in the wheels digging into the sand making the haul up (and even down) the beach very onerous and tiring and especially so as the slope increased.

We found the answer in the Wheeleez kayak trolley. This unique trolley is equipped with larger and wider low pressure balloon wheels which roll over anything with ease. They flatten and roll over rather than dig into the sand. A group of us purchased these and were amazed at how much easier it was to haul the kayaks over the sand. We all agreed it was money well spent and that all serious kayakers should consider purchasing one.

Here are some photos and some of the details:


Attached to kayak

Note the wheels are held in place on the axle by toggle pins by default and not as shown here with a lock which I have put on to prevent the wheels from being stolen as they are the most expensive part of the trolley.

Payload capacity is 80 kg. It weighs 5.4 kg.

It has 2 detachable 30 cm polyurethane balloon wheels.
It has a heavy duty collapsible aluminium frame which is marine grade and anodised after fabrication.
The remaining hardware is made with stainless steel.
It has soft foam bumpers to protect your kayak.
It has a double kickstand for easy loading.
And it comes with 2 cam buckle tie-down straps (4 m)

I have been in contact with the company (Beachwheels) that we purchased them from previously and they have agreed to supply them at the same discount price as before but it is only available to Noosa Yakkers members and orders must be done through me to get that price.

Normally they are $299.00. The discount price is $217.00 plus freight. The freight to Noosa is $26.66 singly or $19.00 each if more than five are sent at once. I would be prepared to have them sent to me for distribution. For those that live in Brisbane the freight is cheaper, singly at around $19 to $20.

All those interested please contact me by email.

Jaro

Our favourite pics (updated Feb 2013)

Photobucket Pictures, Images and Photos

Jaros' Duck Breaker February 2013

 photo LongtailandEasytroll_zps2ebbb57f.jpg

Doc Dog's Tuna Head and lure. January 2013

Photobucket Pictures, Images and Photos

Eyetag's Last Catch December 2012

Photobucket Pictures, Images and Photos

Jimbo's exceptional grass sweetlip, pic by beachgoer. November 2012

Photobucket Pictures, Images and Photos

Kev's close encounter  October 2012


Uploaded from the Photobucket iPad App

Kahuna's longtail tuna September 2012


Ian and Coral Trout
Richmond's pic of eyetag's lovely coral trout caught 05Aug12

Paddleparra in action

Photobucket Pictures, Images and Photos
Noosa Yakkers hanging out on the beach watching returnees, 12May12. Pic by Carla Van Schayk.

Boisterous morning at Middle Groyne
Yes, they got out OK! Launching at Middle Groyne on a marginal day.

Whalebait and whale
Whalebait nervously views humpback whale near A-Bay Reef

Eyetag Spaniard
Eyetag's first yak-caught Spaniard of 2012. Pic by Jaro. Trip Report

carlton, first trip, first tuna, March 2012
Carlton, first trip, first tuna, March 2012

Photobucket Pictures, Images and Photos

Photobucket Pictures, Images and Photos

Photobucket Pictures, Images and Photos

Photobucket Pictures, Images and Photos

Photobucket Pictures, Images and Photos

Photobucket Pictures, Images and Photos

Photobucket Pictures, Images and Photos Photobucket Pictures, Images and Photos

Photobucket Pictures, Images and Photos


Photobucket Pictures, Images and Photos
2011; Gemini, hunting bass at Lake McDonald, Noosa

::::::::::::::

Photobucket Pictures, Images and Photos
2010; scater, Jew Shoal, his first bonito

::::::::::::::

Photobucket Pictures,Images and Photos
Into Jimbo's boot. Will it fit?

:::::::

Our movies


Channels created by Noosa Yakkers members, sorted by age of channel (oldest at top). Detect inappropriate content? Send email to sunshiner. Want your channel included in the list? Contact sunshiner. Tap or click the title to access (except Instagram).

Kev Long's Kayak Fishing with Noosa Yakkers
By sunshiner. Over 100 kayak fishing movies (and Noosa kayak fishing related movies) starting from early 2009 and featuring most of the history of Noosa Yakkers. Playlists established to make it easy to view videos in selected categories (e.g. "How to", "Surf zone transits", etc).

Kayak Fishing by Kayakov
Kayak fishing in Israel, but also some on the Sunny Coast. Movies by fish scientist and Noosa Yakkers member isobar, starting in 2011(?). Some diving and on board longtail tuna gonad removal, for science.

Gemini
By gemini. A video blog of kayak fishing in and around Noosa, Australia by yakker "Gemini", a member of the Noosa Yakkers fishing group. Includes freshwater fishing around Noosa. Started in 2012.

Kayak Fishing Australia
Tyler's channel includes many useful DIY projects for kayak fishers. Established 2013. Divided into playlists for easy selection of categories such as DIY.

Kayak Specialists
Dennis Tocknell (dennisT), Noosa Yakkers member, is also the manager at Australian Kayak Specialists, which imports kayaks from manufacturers such as Stealth and Pinnacle. So this channel is partly commercial. But if you'd like to see their kayaks in action chances are you'll find a suitable movie here. Channel established 2013.

Jamie D : Offshore
JamieD's channel focuses on offshore kayak fishing with lots of surf shots. Established April 2014.

ScottyD Kayak Fishing
By scottyD. Started in early 2015, a growing collection of blue water kayak fishing escapades.

#noosayakkers. This Instagram resource contains short (up to one minute) movies formatted and created specifically to fit the Instagram parameters. The movies have been adapted from content contained in some of the movies in the channels above. Established late 2015.

DIY with polycarbonate

By Geoff Stolberg (jag-one) [Be sure to read the comments below the post, plus extra material added to the post at the end]

Hi Yakkers,

Well, with the rubbish weather we are having, I thought I’d catch up on the subject of Polycarbonate. You may remember a recent Trip Report from Sunshiner, extolling the virtues of his new GPS holder made, by me, of polycarbonate.

Photobucket Pictures, Images and Photos
Here it is again, very neat, eh!

If you aren’t familiar with polycarb, I’ll gladly share my knowledge with you.

Most of you are probably aware of Acrylic or Perspex, and that it can be heated and shaped etc. Polycarb was originally marketed as Lexcen, and was touted as being unbreakable. That’s certainly its prime characteristic but, its biggest asset, I think, is that it can be Cold Bent. This means that if you have access to a metal folding machine or something similar, you are on the track to shaping polycarbonate to suit a variety of needs.

Polycarb cuts and drills the same as Perspex. I try to do my cutting on a tungsten tipped saw bench, but a jig-saw or even a hacksaw will work, obviously depending on the size of the job. My original GPS holder was bent up from acrylic, which took a bit of trial and error. Kev’s holder took me about two minutes to do the bends.

The only drawback with my personal metal folder is that it’s set up for sheet metal, which is anything from .6mm to 1.2mm thick approx. This tends to crease the polycarb when you’re going for a 90deg bend and this is why I have put 2x45deg bends on the rod holder mounts (see pic below). The rod holder in ques­tion was used when catching one of the pair of 50cms snapper on my last trip to SR, and worked perfectly. I’m now working on being able to adjust the bender to suit polycarbonate better.

Photobucket Pictures, Images and Photos
The polycarb mount (left) and the rod holder in place (right)

Polycarb is used by domestic and auto glazing firms and, if they are like me, they will have an offcuts box at a reduced rate. Amateur lure makers often raid these offcut bins for material for their lure bibs.

Most places which carry polycarb would cut to size for you. It is generally available in 3, 4.5 and 6mm thick­nesses, although the heavier gauges are obviously harder to bend. Your local sheet metal shop will have an assortment of benders so it might pay to get to know the owner.

Geoff

More from Geoff, 28Jan12

::::::::::

Hi Yakkers,

After reading Jimbo’s comment on the blog, I realized that I needed to go back to the man cave and do some thinking. I need to do some more bending to make my camera holder, a la Sunshiner, and I didn’t want the creasing from my current machine. Also, I need to come up with something portable, so that you guys can benefit, too.

Anyway, the design is done, giving a unit about 300mm long, and able to be clamped into a vice or screwed to the edge of a bench. Since most uses would call for bending pieces up to 150-200mm wide, ie mounting brackets, then that size should work. Three pieces of angle iron is the basis, so watch this space. Any ideas or suggestions would be welcomed before it goes into production.

I’m looking forward to a PC workshop at Jimbo’s.

See you on the water
Geoff Stolberg
Call Sign ..JaG one

Pics etc added 01Feb12...

The unit will take up to 270mm wide, which should suit our requirements. It can be screwed to a bench or fitted into a vice. As you can see, I have fitted it to my heavy bench. The weight is only a couple of kilos, so very portable. The bending procedure of any job depends on the shape, so the pics are for example only.

:::::::::
Pics provided by jag-one on 01Feb12 and posted same day. There are six pics below, which, if viewed in sequence as you scroll down, show the device and how it is used. Thanks, Geoff.
::::::::::::

Photobucket Pictures, Images and Photos

Photobucket Pictures, Images and Photos

Photobucket Pictures, Images and Photos

Photobucket Pictures, Images and Photos

Photobucket Pictures, Images and Photos

Photobucket Pictures, Images and Photos

DIY storage

Contributed by fishin dan, 11Mar12

As is possibly the case in a lot of your garages also, mine is full of crap. So much crap that I find I can't get the kayak out of the garage by myself as I have to lift it over motorbikes, around cars, under garage doors, dodging a small child, and generally not bashing into things. This has the unfortunate outcome that I find I can't sneak out for a quicky without getting the wife involved, and that kind of defeats the purpose!

Up until now my Prowler Elite has been stored in the garage upside down on two saw horses. This has worked quite well, and I'm pretty happy with that part of it. I've found that stuff just gets chucked underneath it but it's all hard to get at, keep organised, etc.

So I went for a bit of a wander around Bunnings. I looked around to see if there was anything pre-made that could be modified to suit, or anything that gave me some ideas. I took a couple of photos of stuff and prices on the phone, and left it at that. I slept on the idea and in my sleep (as often is the case), I came up with the design.

So this is what I did...

I took a 1800x900x19mm yellow tongue board (used for flooring in houses) like this:

Photobucket Pictures, Images and Photos

And screwed on eight of these:

Photobucket Pictures, Images and Photos

With this result:

Photobucket Pictures, Images and Photos

Although I was sorely tempted to jump aboard right away and try it out as a giant skateboard, I stuck with the mission.

I then laid it on the floor, wheels down, put the saw horses onto it, and chucked the Prowler on top:

Photobucket Pictures, Images and Photos

Underneath the Prowler (front to back) are the c-tug trolley, dry bags, live bait tank, pfd, crate with all the gear in it, and tie down straps. The paddle sits on the saw horse leg supports, up higher, and now everything for the kayak is in the one spot all together and completely mobile.

Now if I want to get out fishing, I can just wheel the whole lot forward out the garage door alongside the car, chuck the kayak onto the roof, wheel the storage back in, and go catch fish! And then just the reverse when I get home. I'm pretty happy with how it's all turned out, and it has certainly tidied the area up. Everything is accessible, and I can get my gear out solo.

I still need to screw the saw horses onto the board so they don't move (my drill went flat), and rather than using occy straps to hold the kayak on, I may use double sided velcro as it'd be a lot stronger with less movement. I'm also tossing up whether to build another one and join them end to end to spread the saw horses further apart... The kayak seems stable though. I did buy some cheap galvanised hooks to attach to the sides of the saw horses to hang the paddle, but I'd forgotten about the leg support beams, so didn't need them.

The 1800x900x19 board was $19.98, and the casters were $1.94 each (I used 8 for maximum support of the board). Cheap as storage, and makes the whole lot mobile. This would be pretty useful for anyone with limited space and limited access.

Hope you all like it!

Fishin Dan